I know that the engine does indeed have new oil in which I added just to keep everything from rusting so please excuse the tub under the engine catching the fluids.
With engine turned over slightly I let the fluids drain out of the engine through all the open holes and removed the lower engine mount which is the metal bracket with 4 bolts.
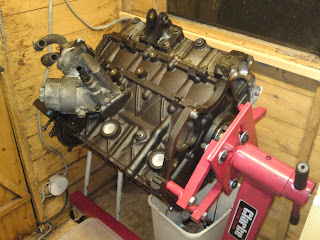
After removing the bracket I then moved on to removing the oil cooler this unit is normally water cooled but I am not sure yet if it will go back as air cooled or water cooled...

With the oil cooler off I then moved my attention to the next section which was to remove the sump, I took the photo with the two larger bolts sticking out as a reminder that when it goes back together all the bolts are the same with the exception of the two longer bolts.

After removing all the bolts I then took the mallet and tapped the sump to break the seal, once done I had the chance to see the bottom of the engine for the first time and it is in very good condition, there are some contaminate within the sump and they look like the plastic from the chain tensioner though I will investigate that later.

The sump strainer was very clean and looked brand new which is good. The next step was to remove the strainer so its out the way. The oring stayed in the block but I removed the oring and placed it on the strainer to remind me to put a new one on later.

With the engine in a situation where I could not continue any more without a puller I decided I would work on the gear box and split in half to start the build and install the LSD

Also while working on the gearbox I started to use the drimmel to remove the oil, carbon, and oxidation which look like it was working well until it ran out... I then continued with removing the bolts of the gearbox which lasted till the torq head bolt snapped the tool... so until this is replaced I will not be continuing - trip to the unit is required.

I then with some excitement offered up the twin screw supercharger I intend to fit. looks lovely, here is a photo of it off the car

Well I hope that with the correct tools I can continue with this shortly.