The roofs arrived on the Friday which meant when I got up Saturday I could start work on them.

I arrived to the unit on Saturday with my spot weld drill bits and drill in hand and set about removing the spot welds off one of the roofs, the solid roof is much easier to remove than one with a sunroof in because there is no internal mig welds so its a case of some grinding and much drilling and the roof simply lifts off.
With the roof skin off I placed it on top of blue and found that the silver and blue actually works quite well, though there are easier ways in which to change the colour of the roof!


With the roof skin on the car I set my attention to chopping the left over frame in to sections marking each bit so I could use them later, this was quite time consuming and kept me busy for a little while.
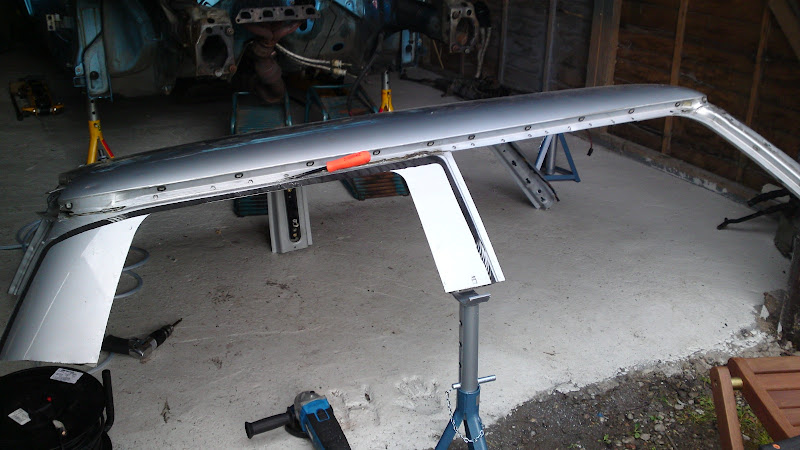
Once chopped up I placed all the parts in a pile and set about placing the roof skin on the rafters of the unit so its safely out the way.
With my tape measure in hand I started to mark out the car so I knew where to cut, this made me slightly nervous as this is where big mistakes will eventually show so taking my time to get it right is vital here, well mostly as I am only tacking it into place so it can come off again if it needs too.
With the roof marked I made my first cut to the A pillar, it was fairly easy to cut and was soon in my hand, I then set about cutting the next section out and before I knew it I was there with my mig in hand ready to tack it on, place the first spot on and the weld was rubbish, I could see it was bad, a quick look at the welder and I soon realised that the gas was off. with that sorted I removed the old weld and placed a few tacks in place, this went really well.


With the front A pillar in place I went home with the question is it low enough? On return the next day I measured and found it was 2.75" which was as planned. I sat in the car and started to work out what I could get away with and still fit people in, a few hours later and there it was a whopping 4.5" lower! This really pleased me as it already started to have the look I wanted.

With the front panel done I set about lowering the B pillar which was more tricky as there is 4 sheets of metal in there. Once cut I put a couple of tack welds. I then picked up one of the sections removed from the spare roof and cut it to size to fit in. Everything there was test fit and I am aware that they need to come out and be put back in straight as currently the B pillar is suffering with some run out which I will sort next time.
