Wednesday, 31 December 2014

headlining layout

Having taken two headlining and cut them up to fit the cars larger roof skin I started to place them in the car, at the moment they are just taped into place but as they are made of GRP they will be fibre glassed together when I next have time

The front section went in really well and actually did not need any tape as the fit was quite tight. All the panels fit flush although without them being fixed they do move about a little

The A pillar covers were cut down to the new height, then plastic welded back together which went really well, ready for a sand and then they will be re-trimmed


The rear section was made of quire a few different sections, I can imagine that this will not be much fun bonding it all together but will be worth it.


Once bonded together I will re-trim in a ultra suede to finish.


Monday, 29 December 2014

Interior

Recently I have been working on the interior, there is still a lot to do on the inside

Rear interior panels, cut about the roll cage, this was a tricky job. Once cut the panels they were covered in carpet to match the rear and make them more durable than the painted finish they had


Because the roof is lower it is wider and longer so I had to take a couple of roof liners and cut them to suite. First I set about marking the first out.


The sections all cut got fitted into the car which meant I was able to measure all the gaps. I now need to go away and get the sections sorted, this will be a task for another day


Gaiters all made, been a while since I last made a set but I actually enjoyed it this time


Interior coming together, a lot of the parts will need a good wash as they are quite dusty


Sunday, 28 September 2014

That dam roof

The sun arrived here in the UK but without any joy. Again the roof popped like it had last time. I couldn't take it any more, the idea behind the composite roof was to keep things light and simple but I could not deal with the odd effect the sun had on the roof.

This time I commissioned someone to make me a full aluminium roof skin and it's amazing, I am so pleased with how it came out and how much lighter than the GRP roof.

GRP roof off

Aluminium roof ready to go on

Car is roofless again :( 

Inside the roof skin in place, showing all the planish and TIG welding


Roof being bonded on and held with duct tape to keep it held while the panel bonding cures

Really pleased with how it all is looking at the moment

Monday, 5 May 2014

Exhaust made

Finally the chance has come that I had both good weather and time to go out and make an exhaust for the car, OK maybe I am cheating a little as I have already purchased a back box and middle box, however it still needs hangers, pipework and also to be welded together.

The system is a nice easy unit, one middle box, 2 mandrel bends, and a back box, which is to all be stainless and all TIG welded together.

Firstly I made hangers for the back box and hung it, then I cut the mandrels down to size and joined them together, once joined I welded them to a straight section of stainless tubing.


The pipework was then welded to the middle box, I did have some alignment issues at fist but this was all resolved during the tacking stage of the welding.

Really pleased with the outcome of the first full exhaust I have ever made, maybe next time I will also make the boxes...


Finial position as one piece, great amount of movement and rigidity, fits perfectly, just need to wait and see how is sounds.


Saturday, 19 April 2014

The answer to the question "What are you doing about the windows?"

Over the years of this what is now quite a long drawn out slow build as I have little to no tome to work on it I have been asked so many times what about the windows? I have always given the response that it is not an issue, time consuming and expensive yes but not a show stopper

Lets start with the sides, rear, and front sides.
Last post you may have seen that I had the plastic safety glass arrive, this was created from fibre glass templates I had sent them, they are all e46 marked direct from the manufacture which is a legal requirement to go on the road. My thanks here go to plastics4performance who helped by manufacturing to size and delivered as expected.
All I can say is this was so easy, you may ask why I did not cut the glass down? the long and short of it is you can't really cut toughened glass which all the sides and rears always are. If you tried to cut them they would explode in to tiny pieces and the only way about this would be to anneal the glass and then re-toughen it which at home is near impossible.

With the glass to hand this was bonded into the car and it all looks very OEM with the painted black edges and as I went with the 4mm hard coated plastic other than it sounding like plastic when you tap it the performance is the same glass regarding scratching.


With the side glass all in place (fronts are in the door) I will post a picture next time it it out with the windows up. I realised that I needed to cut the front laminated screen down to fit.
I had purchased a few screens which could have been 2 years ago and they had just sat in the garden collecting mud and muck. I took the time to clean them back to a fresh clean finish first.

With the windscreen clean it was time to mark it out, I had to lean over the glass to mark it and put my knee against it which saw the first screen smash... I was gutted, smashed before I started.


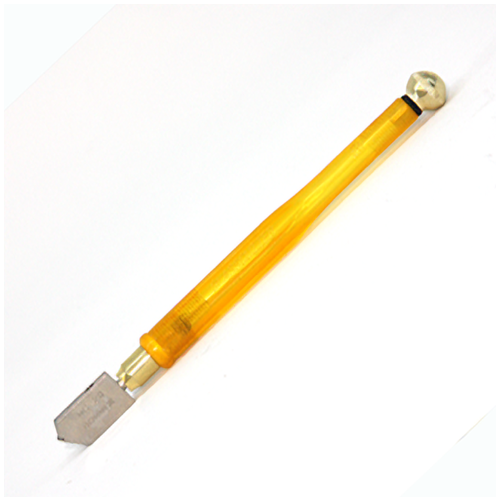
OK, so I had smashed the glass but thought this would now be a good piece to trial cutting on, so the tools used to do the job as this is something not very well covered on the net, a oil filled glass cutting tool filled with baby oil or 3in1 with a thin viscosity, sharp Stanley knife, blow torch, and some goggles & gloves. The time taken after marking was no longer the 10 minutes. Only important note is to make sure that the screen is fully supported, I used old rags and bags of shredded paper.

With the glass all marked up the first thing to do was relieve some of the stress on the glass, this was done by removing the two top corners down to the mark we would cut across later. Take the cutting tool and score in across the corner, do the same on the other side of the glass in about the same area, the closer the two lines the more success you will have, take the other end of the cutting tool and there should be a metal cap, tap on the score line from the underside this could be either way around, as  you tap you will see the top piece of glass crack along about 30mm then tap the top score line and you will see the bottom score crack - keep doing this till you have worked along the score and it is broken. next you need to remove this section, I used a blow torch to pass up and down over the crack 3 or 4 times without pausing on any area. Too much heat and you will burn the laminate and you will cause bubbles in the glass you want. with the laminate hot have someone hold the glass while you pull the corner (this may be hot) also do not try and bend the laminate and glass else you may chip and crack the glass you wish to keep, once the glass has pulled take your knife and cut the laminate, you are done with the corner so do the other.


With the corners removed the glass was scored along the screen and the same process was followed, the glass seamed to tap and crack better with the middle at its lowest point. I had to pass the blow torch over about 8 times due to the 15 degree C ambient temperature and a slight breeze. Then the glass was separated by pulling the glass from one end, once the knife was in the laminate was pulled and cut.

OK, I was happy with the smashed unit so this process was followed again, this time without putting my knee through it and I am glad to say everything went well and the screen is now placed in the car.


I need to now paint the top of the glass as I have no black edge and can see body work under but once that is done it will be bonded in and the car will be mostly water tight, I say mostly as I have to finish the door and boot seals...

For those that are interested here is a list of tools again

  • Blow torch
  • Glass cutting tool with oil, the same used to cut flat glass and used in stained glass workshops
  • Gloves & glasses
  • Sharp bladed knife
Tool used


Thursday, 27 February 2014

Windows have arrived

The first big question asked by almost everyone on this project what am I doing about the windows? Alot of people ask will I cut them down; the answer to that is no as I will explain below;

Side and rear glass is always tempered which is classed as safety glass, it is tempered to ensure if broken it breaks into pieces and does not shard which may cut you to piece in an accident. You can think of toughened glass like a sweet, there is a hard coat over the top and a soft inside (its not soft but less than the surface) when the tension on the hard outside is broken then the window shatters therefore if I cut it I would end up with a pile a pieces. I have seen on youtube tempered glass cut with a plasma but as soon as the glass cools it pops so this is no good, you can anneal the glass and then cut it and re toughen the glass but you need all the correct kilns and jigs to do this and it would be very expensive.

The front screen is never toughened or every stone that hit the windscreen would pop it into millions of pieces so in this instance you have 2 pieces of glass non tempered sandwiching a plastic inner which is stuck to the both pieces of glass, the plastic inner provides the flexibility to allow the glass to smash but then holds it all together, this is a safe method and has been used for many years. Many people presume that its toughened. It's not as that would be crazy, just think how when a little stone hits the screen and it shatters into a million pieces, you would not want that so the laminated glass allows the class to chip, crack and shatter but holds it all together.
The front screen can be cut but it is an art to cut both sides and then break it correctly, something I am yet to do.

All windows in cars need to meet a set standard, because I have changed the chassis of this car I need to take the car to the new IVA (BIVA / SVA) test and the windows will be reviewed so I can't put anything in there. Thankfully a call to plastics4performance and some fibreglass templates + money meant that I got all the side and rear windows manufactured all with the correct ece 43r markings. The plastic is a safety plastic and is treated differently so that it meets the IVA book recommendation and has been tested.

Here are a few of the screens, they are blue because I am not removing the plastic protective screen until I fit them.


I have been working hard on the car and not posting recently as I want to really get a move on with the car and I do not think that the saga will be going for very much longer

Thursday, 16 January 2014

Front bumper and home

4 years since I started what has turned out to be quite a bumpy journey, involving body shops conning me and not doing work - work not to the best standard, having to have to stop for a back operation and also move house has all kept this project lagging behind only having a few hours every now and then to play.

Good news the car is now in my garage and I can continue to work on it even if its a little in each evening and I plan to install one part each day and then spend a day on it over the weekends to push the build forward.

I wanted to thank both bodytech solihull and eastcoat customs for all the body shop work which was good and unlike the other body shops did what I wanted without asking for cash and running / doing nothing. (name and shame will come at the end of the build with the full thanks to the good guys out there)

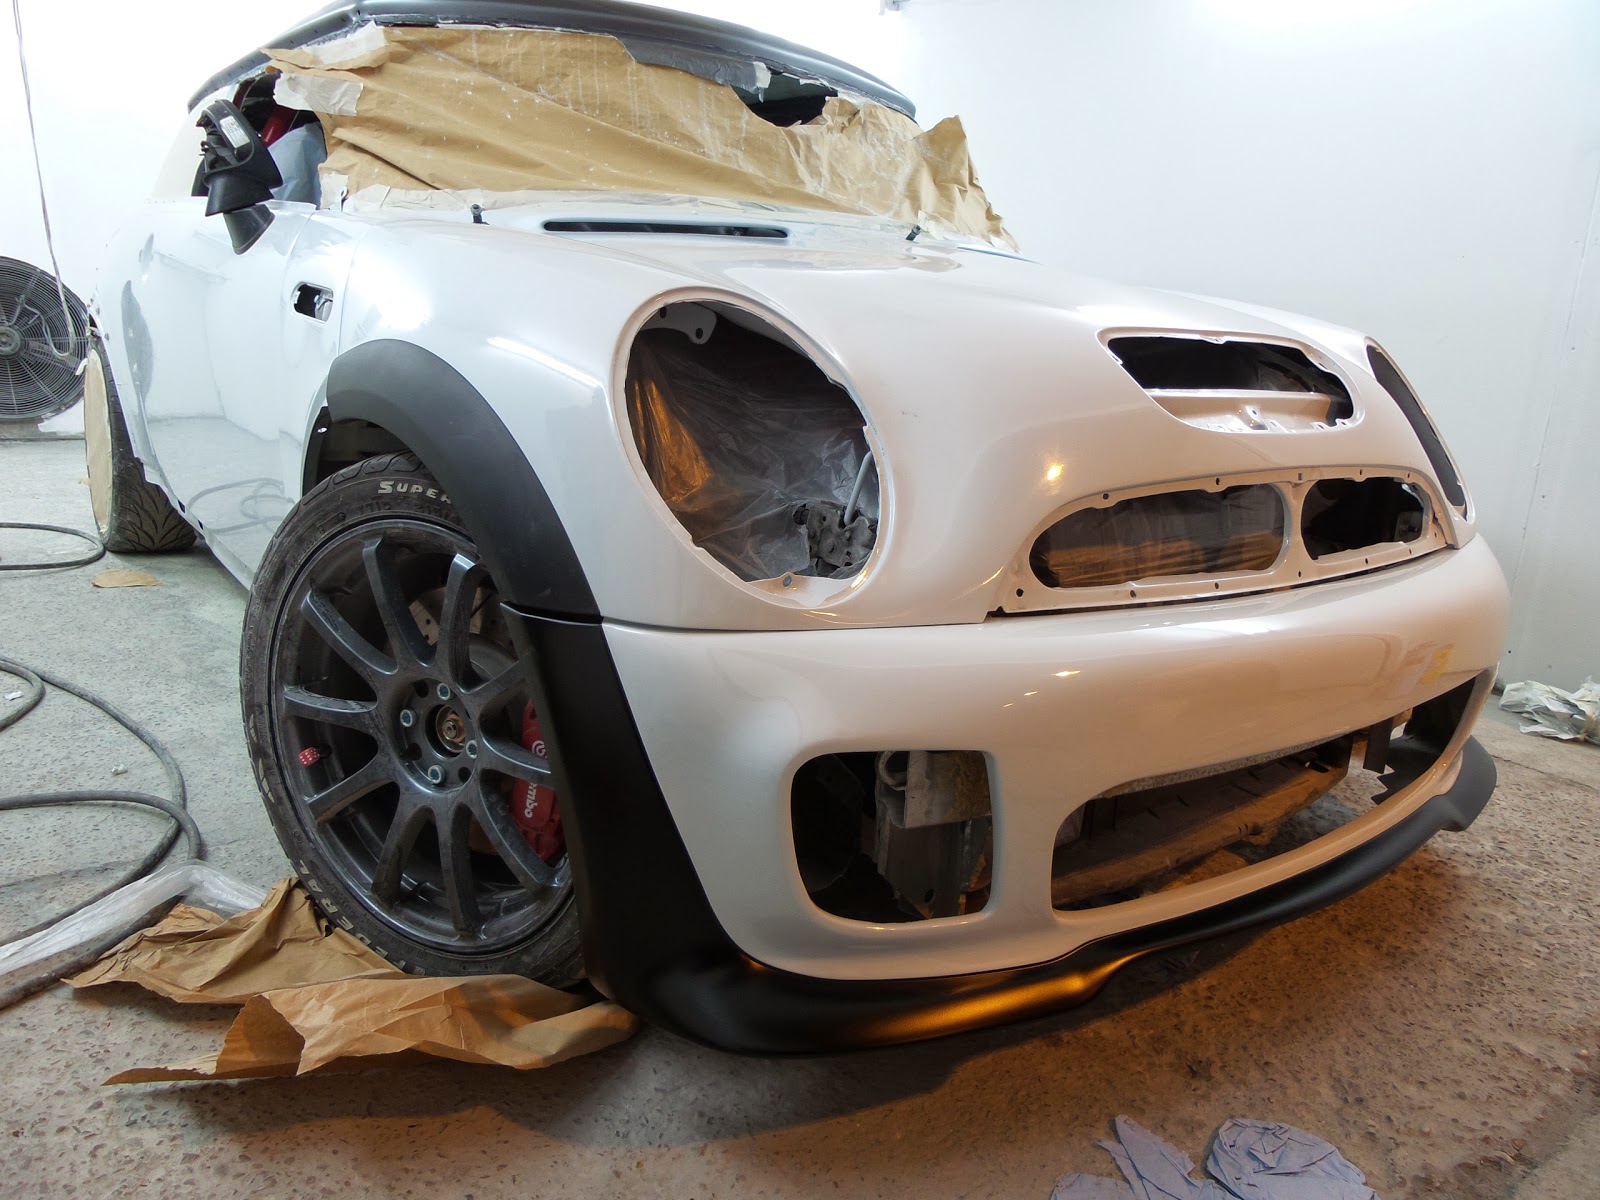
Here is the last photo taken from the body shop, notice the R56 bumper I made on the front and the lovely fit which did need some fettling to fit perfectly as the moulding process had a few little errors. Now its all splendid.


With the car on the way home I decided that I wanted to finish the front headlights, this involved adding super bright LEDs into the xenon cluster which will be used as day time running lights and should help to face lift the cars appearance, also I like the look of this modification


I wanted to thank my normal tow truck gent but I have forgotten his name but I will add it to the thanks list as he always takes cares of my cars when moving them and does a great job in delivering the car safely where it needs to go. This time its home for me;


I will now try and update this blog more with more photos and updates as the work continues...