After making what can only be described as the thickest heaviest front bumper in the world I sent it off to the fibre glass company for them to make a mould and a bumper off it. Have to say its looking mighty fine and I am really pleased with it.
I have suggest that I will do a limited run of the bumpers over on minitorque.com but at the moment health issues stop me moving much and hope that I can just man up and get over it. However this means I can get on with little jobs that need doing
First bumper off the mould, it has the curves and features I wanted with the bumper, probably still some work to go but not too far off now


The bumper is very pleasing and while its not quite my first I think I am happy to say its the most successful I have ever made.
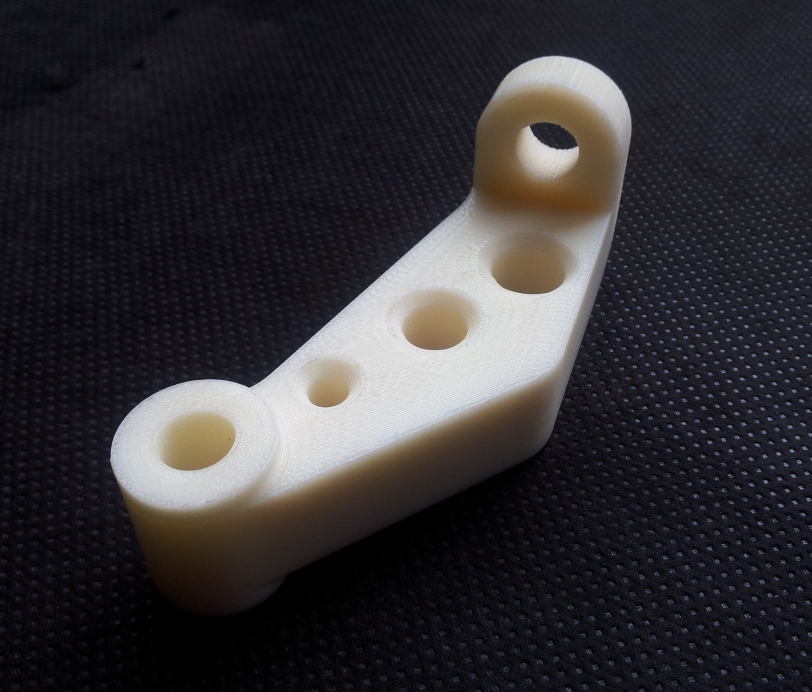
Other items on the go at the moment are the remaining brackets to hold bits on the engine. I am fortunate enough that my design consultancy has a very good 3D printer which has enabled me to print the items out before going to metal. Can't wait to bolt them on and try them as its just one step closer. The alternator bracket I wanted to add some old school hot rod feel to it and decided to just add the three holes. The supercharger bracket I added triangles between the ribs as it was material not required, I may make some changes to this...


I have suggest that I will do a limited run of the bumpers over on minitorque.com but at the moment health issues stop me moving much and hope that I can just man up and get over it. However this means I can get on with little jobs that need doing
First bumper off the mould, it has the curves and features I wanted with the bumper, probably still some work to go but not too far off now


The bumper is very pleasing and while its not quite my first I think I am happy to say its the most successful I have ever made.
Other items on the go at the moment are the remaining brackets to hold bits on the engine. I am fortunate enough that my design consultancy has a very good 3D printer which has enabled me to print the items out before going to metal. Can't wait to bolt them on and try them as its just one step closer. The alternator bracket I wanted to add some old school hot rod feel to it and decided to just add the three holes. The supercharger bracket I added triangles between the ribs as it was material not required, I may make some changes to this...